Atom-7B-chat
环境准备
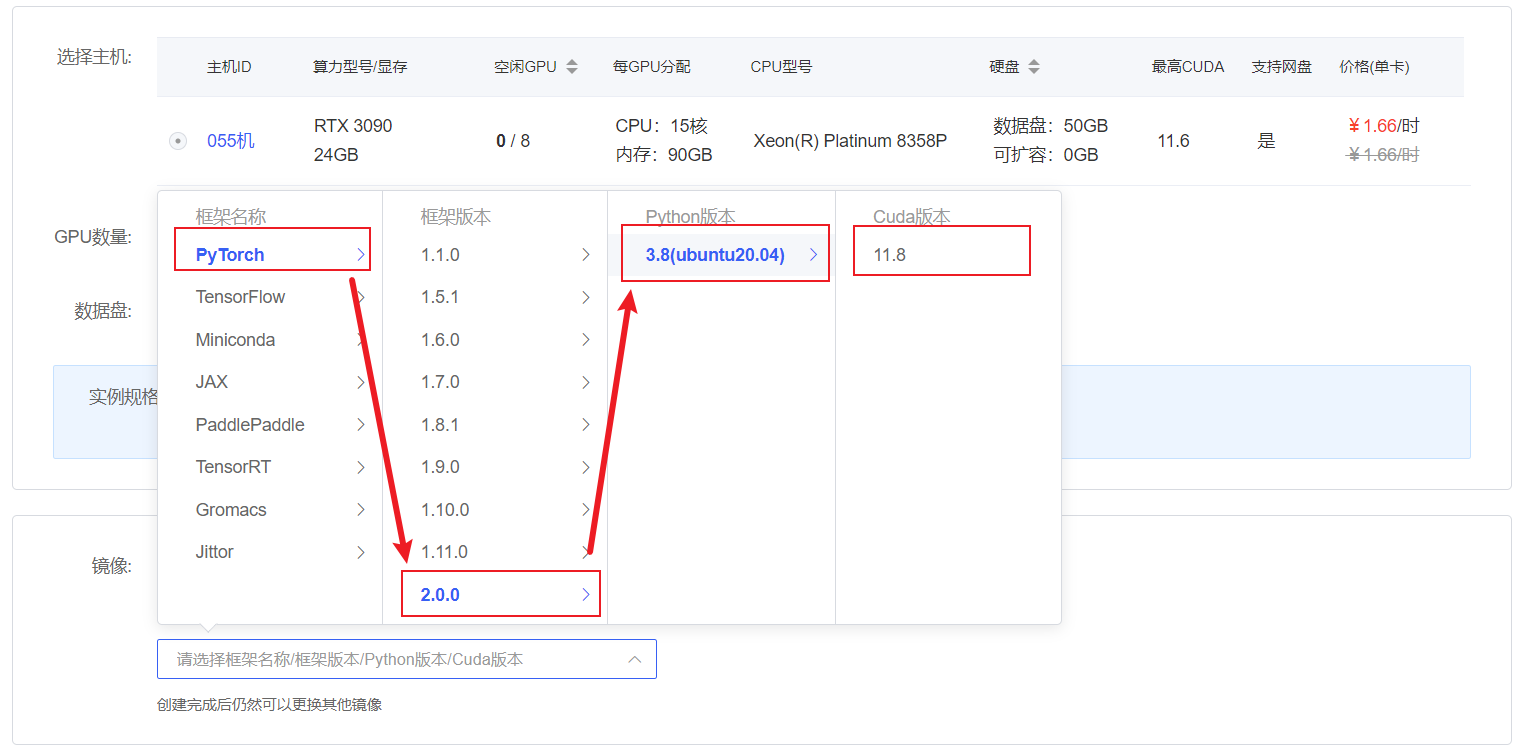
在autodl平台中租一个3090等24G显存的显卡机器,如下图所示镜像选择PyTorch-->2.0.0-->3.8(ubuntu20.04)-->11.8
接下来打开刚刚租用服务器的JupyterLab,并且打开其中的终端开始环境配置、模型下载和运行demo。
pip换源和安装依赖包
shell
# 升级pip
python -m pip install --upgrade pip
# 更换 pypi 源加速库的安装
pip config set global.index-url https://pypi.tuna.tsinghua.edu.cn/simple
#安装项目相关依赖包
pip install modelscope==1.9.5 transformers==4.35.2 gradio==4.4.1 SentencePiece==0.1.99 accelerate==0.24.1 bitsandbytes==0.41.2.post2

# 如遇 flash_attn 安装失败,请根据环境手动安装匹配的 wheel 包
# 例如:PyTorch 2.0.0 + Python 3.8 + CUDA 11.8(Ubuntu 20.04)
# 可直接使用下述预编译 wheel:
# 参考来源:https://github.com/Dao-AILab/flash-attention/releases
pip install https://github.com/Dao-AILab/flash-attention/releases/download/v2.6.3/flash_attn-2.6.3+cu118torch2.0cxx11abiFALSE-cp38-cp38-linux_x86_64.whl

# 其他环境请从 flash-attention Releases 页面选择与自身 CUDA / PyTorch / Python 版本匹配的 wheel
# 若无匹配 wheel,亦可参考官方文档源码编译安装模型下载
使用 modelscope 中的snapshot_download函数下载模型,第一个参数为模型名称,参数cache_dir为模型的下载路径。
在 /root/autodl-tmp 路径下新建 download.py 文件并在其中输入以下内容,粘贴代码后记得保存文件,如下图所示。并运行 python /root/autodl-tmp/download.py执行下载,模型大小为 13 GB,下载模型大概需要 10~20 分钟
python
import torch
from modelscope import snapshot_download, AutoModel, AutoTokenizer
import os
model_dir = snapshot_download('FlagAlpha/Atom-7B-Chat', cache_dir='/root/autodl-tmp', revision='master')代码准备
首先clone代码,打开autodl平台自带的学术镜像加速。学术镜像加速详细使用请看:https://www.autodl.com/docs/network_turbo/
shell
source /etc/network_turbo然后切换路径, clone代码.
shell
cd /root/autodl-tmp
git clone https://github.com/FlagAlpha/Llama2-Chinese.git切换commit版本,与教程commit版本保持一致,可以让大家更好的复现。
shell
cd Llama2-Chinese
git checkout 0a2b588c5716f26f1e37affa308283354b3612be最后取消镜像加速,因为该加速可能对正常网络造成一定影响,避免对后续下载其他模型造成困扰。
shell
unset http_proxy && unset https_proxydemo运行
进入代码目录,运行demo启动脚本,在--model_name_or_path 参数后填写下载的模型目录
shell
cd /root/autodl-tmp/Llama2-Chinese/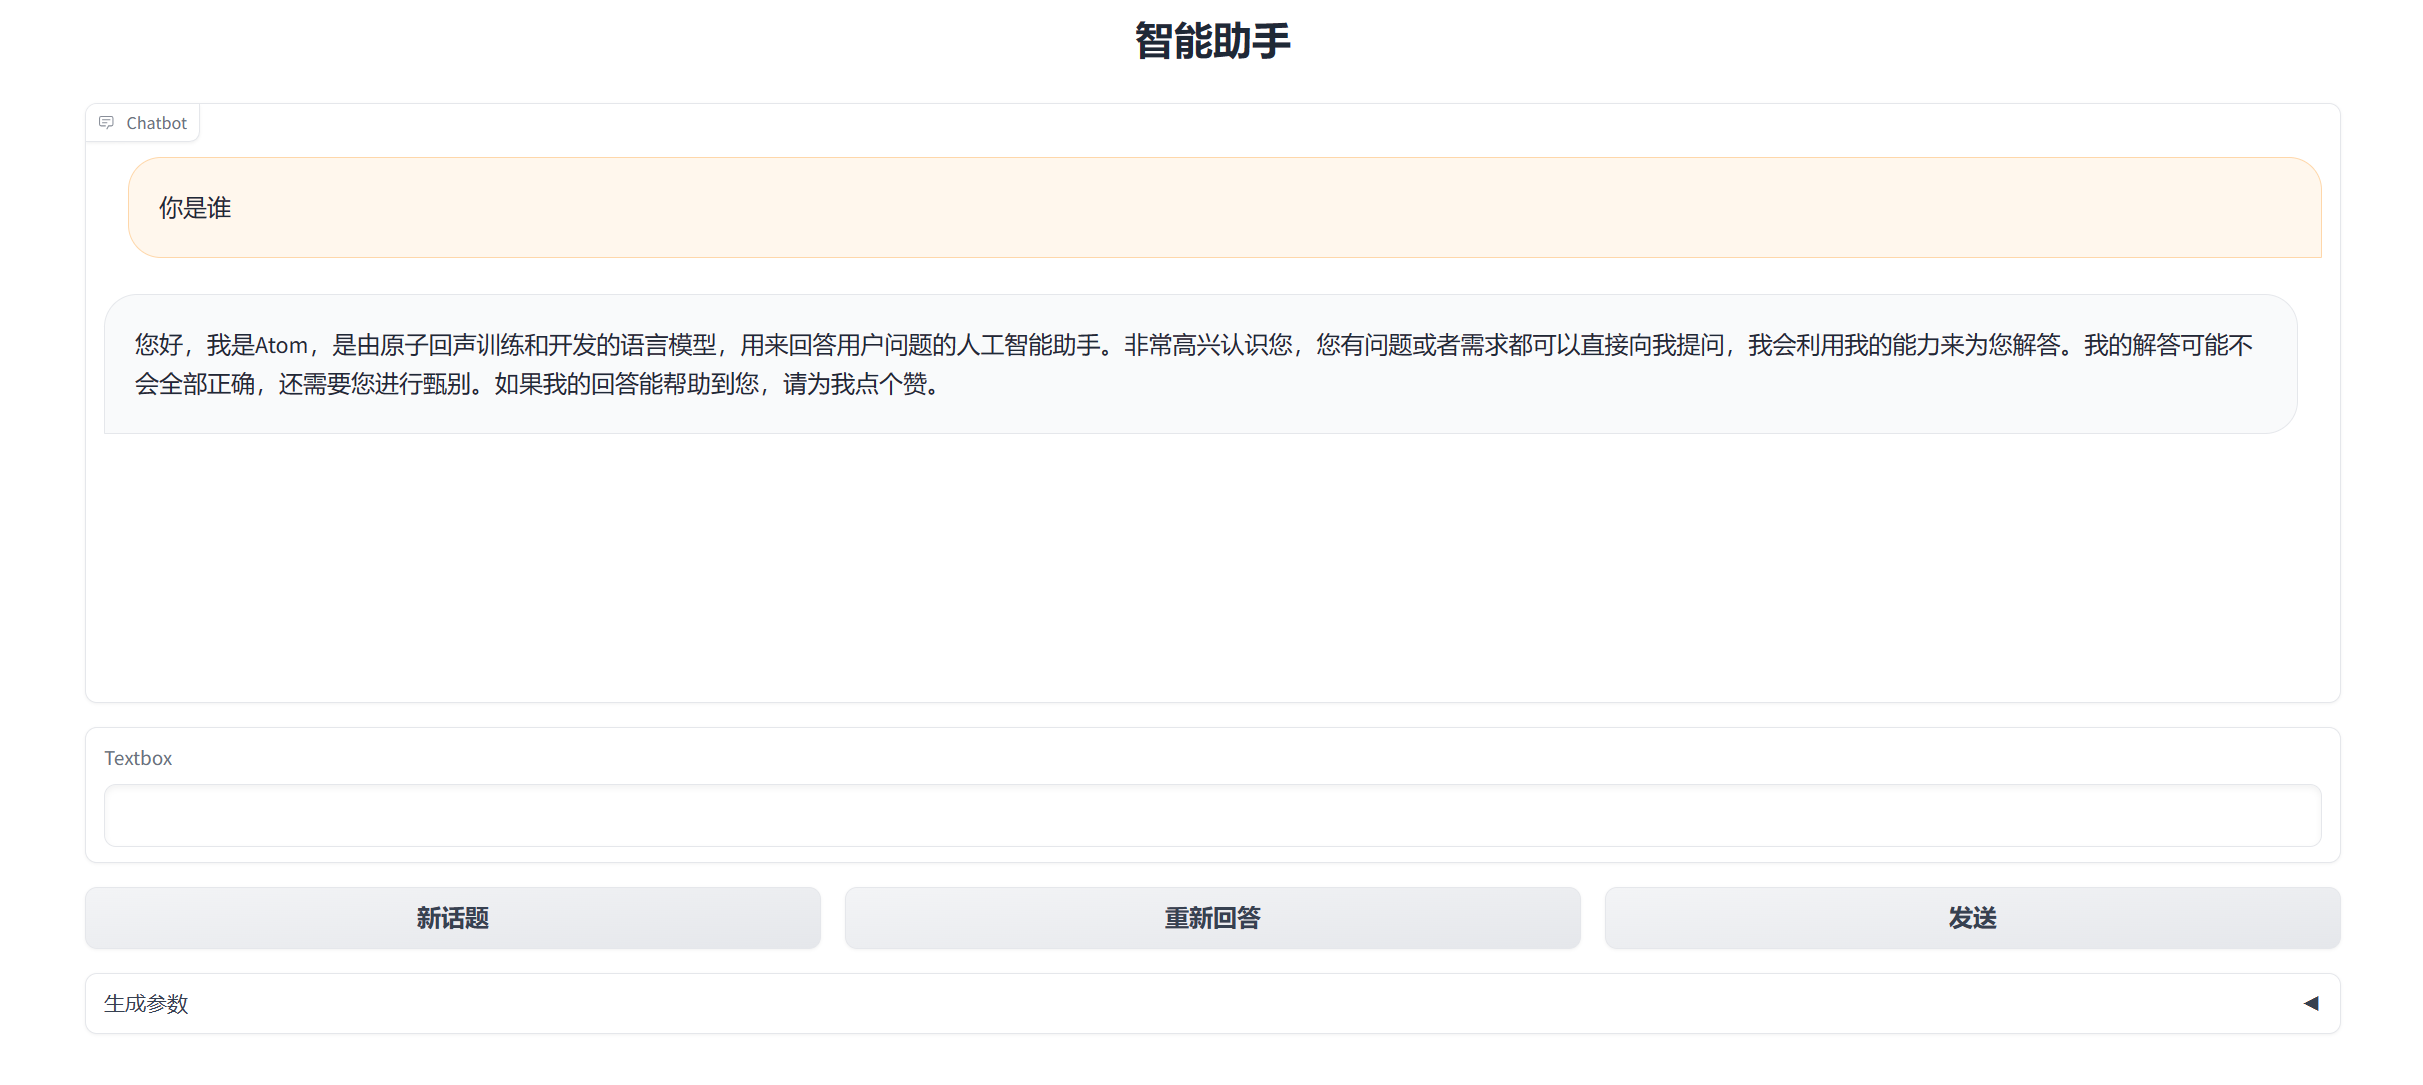
python examples/chat_gradio.py --model_name_or_path /root/autodl-tmp/FlagAlpha/Atom-7B-Chat/启动成功后终端显示如下: 
设置代理访问
在Autodl容器实例页面找到自定义服务,下载对应的代理工具 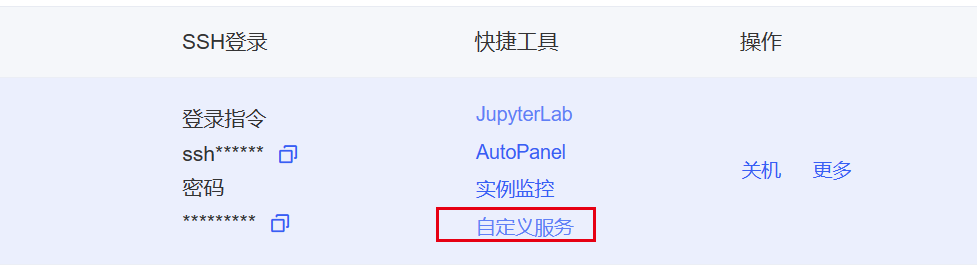
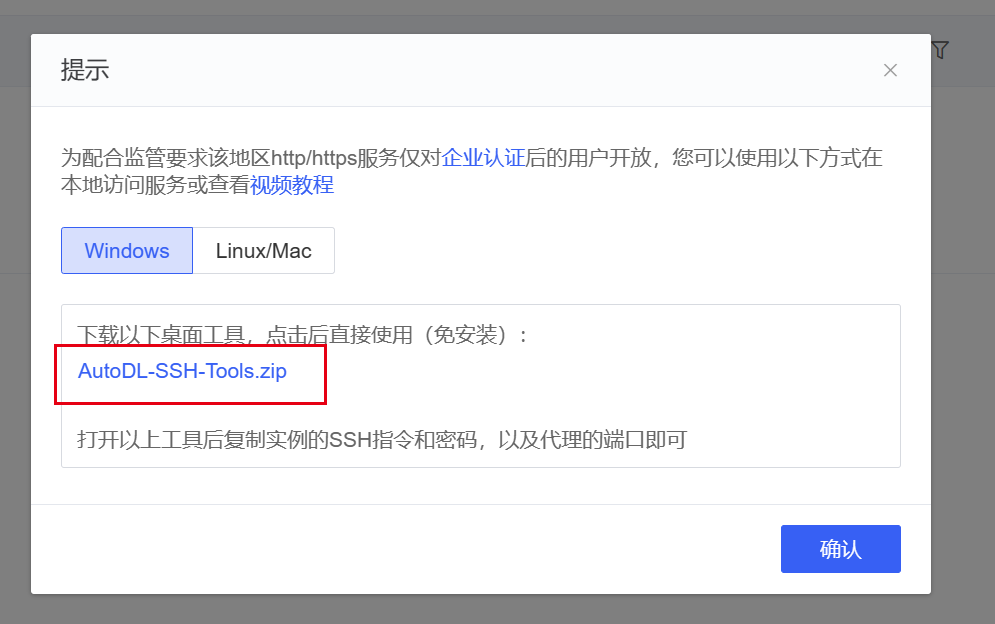 启动代理工具,拷贝对应的ssh指令及密码,设置代理端口为7860,点击开始代理
 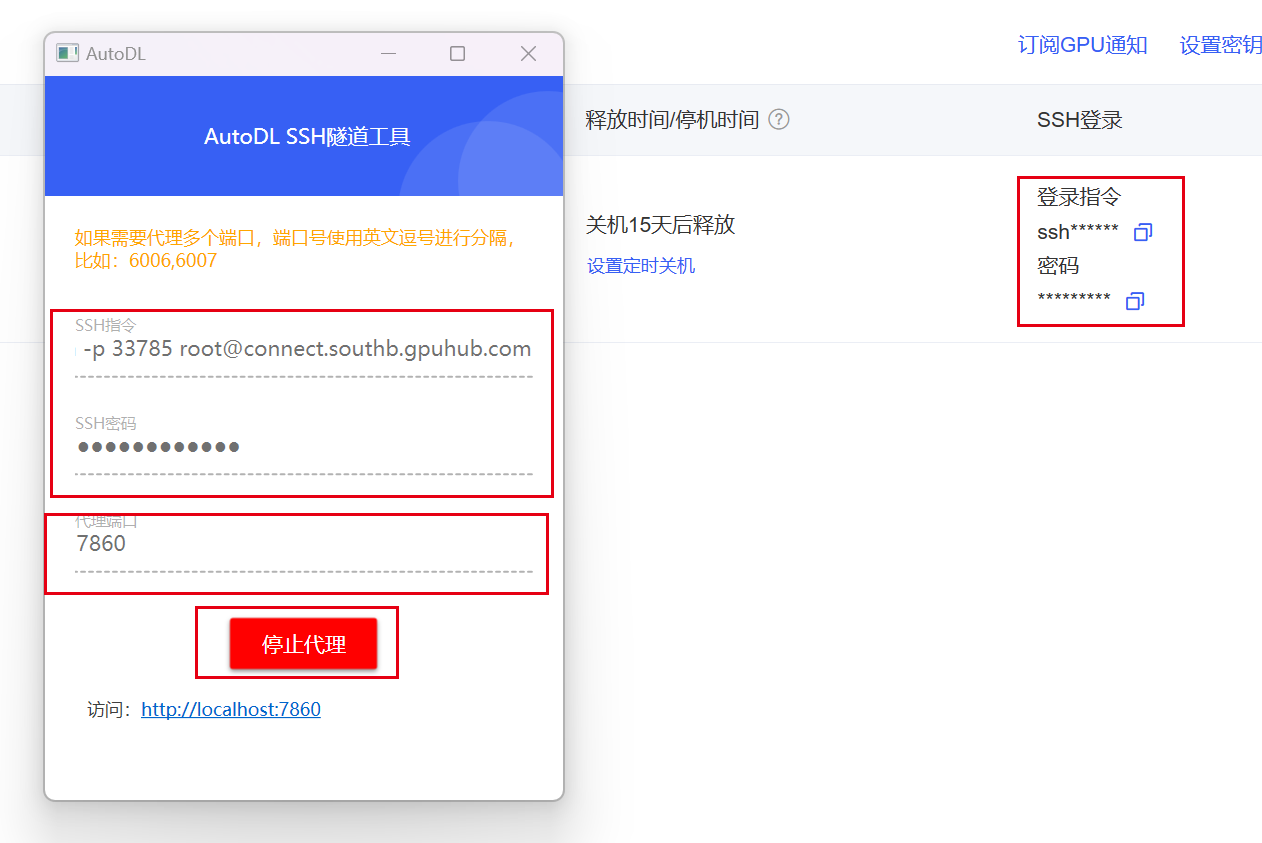 代理成功后点击下方链接即可访问web-demo